Putting in a Paver Walkway Your Backyard Oasis
Putting in a paver walkway is rewarding, transforming your backyard into a beautiful and functional space. This comprehensive guide will walk you through every step, from initial planning to final maintenance. We’ll explore design choices, construction techniques, and crucial considerations to ensure your paver walkway looks stunning and stands the test of time.
We’ll delve into selecting the perfect paver materials, from classic brick to modern concrete, considering durability, aesthetic appeal, and budget. You’ll learn about various paving patterns and layouts, from simple lines to elaborate designs, and how to create a walkway that complements your home’s architecture. The construction section will cover ground preparation, installation techniques, and addressing drainage issues. Finally, we’ll provide expert advice on maintaining your new paver walkway, ensuring its longevity and beauty for years to come.
Planning & Design: Putting In A Paver Walkway
A well-planned paver walkway project ensures a beautiful and functional addition to your backyard. Careful consideration of design, materials, and site conditions is crucial for a successful outcome. This section details the essential steps for planning and designing your paver walkway.
Planning a paver walkway involves a systematic approach to ensure the final product meets your aesthetic and functional needs. This involves thorough site assessment, precise measurements, and thoughtful design considerations, culminating in a beautiful and durable pathway.
Site Assessment & Measurements
Thorough site assessment is the foundation of any successful paver project. This includes evaluating the existing ground conditions, identifying any potential drainage issues, and assessing the surrounding landscape. Proper site preparation ensures the longevity and stability of the paver walkway. Measurements should be precise, encompassing the entire area of the planned walkway, including curves and angles. Using a measuring tape and marking the layout on the ground is vital for accuracy. Detailed records of dimensions and any obstacles (trees, utility lines) are crucial for proper installation.
Material Selection
Choosing the right paver material is essential for both aesthetics and durability. Different materials offer varied aesthetics, durability, and cost. A comparative analysis of common materials like concrete, brick, and stone is presented below.
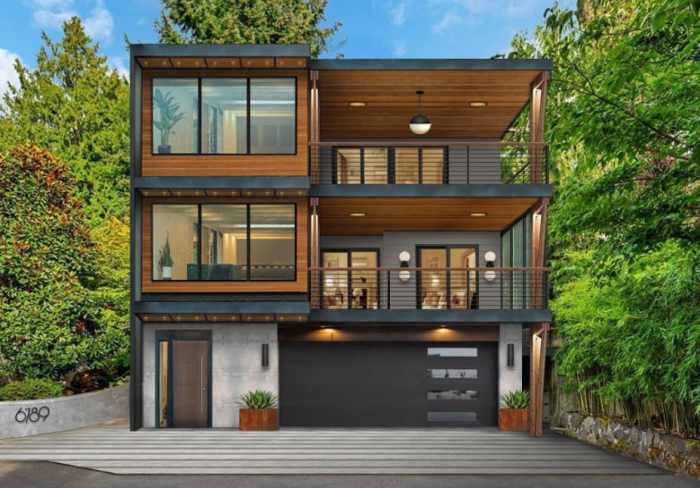
- Concrete Pavers: Concrete pavers offer a wide range of colors and textures, making them versatile for various design styles. They are generally durable and cost-effective, but their installation can be more complex than other options. A common example is a modern, minimalist design using large, uniform concrete pavers.
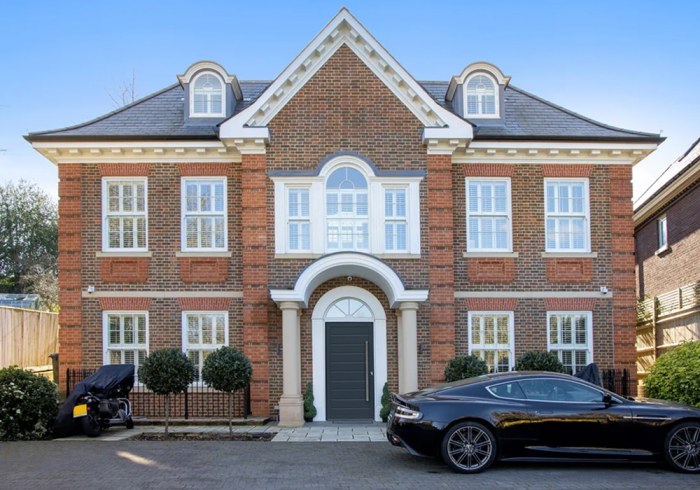
- Brick Pavers: Brick pavers exude a traditional charm and are known for their aesthetic appeal. They are readily available in a variety of colors and sizes. Brick pavers can enhance a home’s traditional or craftsman-style architecture. However, they can be more costly than concrete pavers.
- Stone Pavers: Natural stone pavers offer a unique and elegant touch. Their natural variations in color and texture create a distinctive aesthetic. Stone pavers, though visually appealing, often come with a higher price tag compared to concrete and brick. They are well-suited for gardens and outdoor spaces with a natural theme.
Layout Design
A well-designed layout ensures a smooth and visually appealing walkway. The layout should consider curves, angles, and transitions to create a natural flow and visual interest. A medium-sized backyard layout should incorporate a blend of straight sections and curves. A simple, yet effective design for a medium-sized backyard could involve a straight section leading to a curved section that meanders around a garden bed. This approach balances functionality with aesthetic appeal.
Paving Patterns & Styles, Putting in a paver walkway
Different paving patterns and styles can significantly impact the visual appeal of a walkway. The chosen pattern should complement the overall home design. A herringbone pattern creates a sophisticated and traditional look. A running bond pattern provides a classic and clean appearance, suitable for modern or contemporary designs. A more elaborate pattern can involve the use of different colors and shapes to create a visually interesting design. Consider the scale and layout of your backyard when selecting a pattern.
Comparative Analysis of Paving Materials
| Material | Durability | Aesthetics | Cost | Pros | Cons | Examples |
|---|---|---|---|---|---|---|
| Concrete | High | Versatile | Moderate | Wide range of colors, textures, and sizes; relatively affordable | Can be challenging to install; may require more maintenance | Modern walkways, patios |
| Brick | High | Traditional | High | Classic look, excellent durability, readily available in various colors | More expensive than concrete; can be more labor-intensive to install | Traditional homes, courtyards |
| Stone | Very High | Elegant | High | Unique natural appearance; long-lasting | High initial cost, challenging to install, variations in color and texture | Luxury gardens, outdoor kitchens |
Construction & Installation
Preparing a paver walkway involves meticulous planning and execution, ensuring a durable and aesthetically pleasing final product. Proper ground preparation, precise installation techniques, and careful consideration of drainage are critical for long-term success. This section details the steps involved in creating a high-quality paver walkway.
Ground preparation is the foundation of a successful paver walkway. A level, stable base is essential for the pavers to lay evenly and avoid future settling or shifting.
Ground Preparation
Thorough ground preparation ensures the stability and longevity of the paver walkway. This involves a series of steps from excavation to compaction. Excavation should remove enough soil to achieve the desired depth for the paver base, typically 4-6 inches. Carefully remove any existing vegetation, roots, or debris. Compaction is critical to eliminate voids and ensure the base’s stability. Use a mechanical compactor to achieve uniform compaction. A layer of compacted gravel or crushed stone, typically 2-4 inches thick, forms a base for the pavers.
Paver Installation
Precise installation of pavers is vital for a smooth, attractive walkway. Proper bedding, grouting, and finishing are key steps in this process. A layer of sand or a specialized bedding material is laid on top of the compacted gravel, ensuring a level base. Pavers are carefully placed on the bedding material, ensuring they are aligned and evenly spaced. Grout, a mortar-like substance, fills the gaps between pavers. After grouting, excess material is removed, and the walkway is swept clean. Finally, the surface is cleaned and sealed to protect the pavers from stains and weathering.
Edging
Edging defines the perimeter of the paver walkway, providing a clean and finished look. Several methods are available for creating this edging.
- Concrete Edging: Concrete edging is a popular choice, offering a strong and durable border. It provides a clean, professional look. A disadvantage is the longer installation time compared to other methods.
- Metal Edging: Metal edging, often made of aluminum or steel, is another common option. It offers a modern aesthetic and can be easily installed. The downside might be its susceptibility to rust or corrosion over time.
- Brick Edging: Using bricks as edging provides a classic and visually appealing border. It complements many architectural styles. However, the installation process can be more complex and time-consuming than other options.
Drainage
Proper drainage is crucial to prevent water pooling around the walkway, which can lead to damage and uneven settling. Consider the natural slope of the ground and install the walkway with a slight incline to allow water to drain away from the structure. Install weep holes or drainage pipes, if necessary, to channel water to designated areas. Drainage solutions should be integrated into the design phase.
Retaining Wall Installation
A retaining wall can be incorporated into the paver walkway project, providing support and stability, especially on sloped areas. The installation sequence typically involves excavating the area, installing the retaining wall, placing the paver base, and finally, installing the pavers on top of the base. Carefully consider the structural capacity of the retaining wall and ensure proper compaction of the soil behind it to prevent settlement.
Tools and Equipment
The following table lists the essential tools and equipment for a paver walkway installation:
| Tool/Equipment | Function | Importance |
|---|---|---|
| Shovel | Digging and moving soil | Essential for excavation and preparation |
| Mechanical Compactor | Compacting soil and gravel | Ensures a stable base for the pavers |
| Level | Checking for level surfaces | Crucial for accurate paver placement |
| Paver Trowel | Distributing bedding material | Ensures even support for pavers |
| Grout Mixer | Mixing grout | Ensures proper consistency and application |
| Grout Float | Applying and smoothing grout | Provides a finished and uniform surface |
| Edging Tool | Creating the walkway perimeter | Defines the edges of the walkway |
Maintenance & Considerations

Source: com.au
Proper maintenance is crucial for the longevity and aesthetic appeal of a paver walkway. Regular care prevents premature deterioration and costly repairs. Addressing potential issues proactively will minimize disruption and ensure your walkway remains a beautiful and functional part of your property for years to come.
Maintaining a paver walkway involves a multifaceted approach, encompassing cleaning, sealing, repair, and proactive safety measures. Understanding potential challenges and their solutions is essential for long-term success. Implementing appropriate safety precautions during all phases is paramount.
Long-Term Maintenance Strategies
Regular cleaning is vital to maintain the walkway’s appearance and prevent the accumulation of dirt, debris, and stains. Pressure washing is often effective for removing surface grime, but it’s essential to avoid excessive pressure that could damage the pavers. A soft-bristled brush and mild detergent solution are suitable for delicate or intricate designs.
Sealing is a crucial preventive measure. It protects the pavers from moisture penetration, reducing the risk of staining, mold growth, and deterioration. The choice of sealant significantly impacts the walkway’s lifespan. Different sealants offer varying degrees of protection and longevity.
Comparison of Sealing Methods
Various sealing methods are available, each with unique characteristics. Epoxy-based sealants, for example, are known for their high durability and resistance to chemical spills. However, they may not be as aesthetically pleasing as penetrating sealants. Penetrating sealants, on the other hand, absorb into the pavers, offering a more natural appearance and potentially better long-term protection. However, they may not be as effective at preventing surface staining. A professional assessment can help determine the optimal sealant for specific paver types and environmental conditions.
Common Issues and Repair Methods
Cracks and uneven settling are common issues in paver walkways. Small cracks can be filled with specialized epoxy or polyurethane fillers. Larger cracks may necessitate partial or full replacement of affected sections. Uneven settling, typically caused by shifting soil, often requires addressing the underlying soil conditions. Professional assessment and repair are crucial to avoid further damage.
Potential Challenges and Solutions
- Soil Conditions: Poorly compacted or unstable soil can lead to uneven settling. A soil assessment and remediation plan, including proper compaction, is crucial to prevent issues. Using compacted sub-base material is crucial.
- Drainage Issues: Inadequate drainage can lead to water pooling, causing damage to the pavers and potential structural problems. Proper grading and drainage solutions, like installing French drains or improving the slope of the area, are necessary.
- Freeze-thaw Cycles: Repeated freezing and thawing can cause expansion and contraction of the soil, potentially leading to cracks in the pavers. A well-designed base layer and proper drainage can minimize the impact of these cycles.
- Unexpected Weather Events: Heavy rains, floods, or severe weather conditions can lead to damage. Prior assessment and design strategies to account for the local climate are vital.
Safety Measures
Proper safety measures are essential throughout the entire project lifecycle. Personal protective equipment (PPE), including safety glasses, gloves, and sturdy footwear, should be worn during installation and maintenance. Proper handling and storage of materials, including sealants and fillers, are also crucial.
Paver Walkway Repair Table
| Repair Type | Materials | Methods | Estimated Cost (USD) |
|---|---|---|---|
| Small Crack Repair | Epoxy/Polyurethane filler | Filling the crack with the appropriate filler | $50-$200 |
| Large Crack Repair | Concrete or paver segments | Partial or full replacement of the affected area | $200-$1000+ |
| Uneven Settling Repair | Soil stabilization materials, leveling materials | Remediation of underlying soil conditions | $100-$500+ |
| Drainage Repair | French drains, gravel, pipes | Installation of the drainage system | $200-$1000+ |
Closing Summary
In conclusion, putting in a paver walkway is a significant undertaking, but one that can greatly enhance your outdoor living space. By following the detailed planning, construction, and maintenance strategies outlined in this guide, you can confidently transform your backyard into a beautiful and durable oasis. Remember to carefully consider your design preferences, budget constraints, and local conditions throughout the process. With diligent planning and execution, you’ll enjoy a beautiful and functional paver walkway for years to come.